ReproScripts Imposition Flexo plate plugin for CorelDraw
- dedicated CorelDraw plugin for flexo printing
- impose one or several jobs for different sizes of rolls
- printing marks, scales, microdots for flexography
- special rules for the white underprint and 100% solid separations
- archive of completed projects for fast access
Flexo printing is a widespread technology that has its own features, which are practically not taken into account in most popular graphics packages, including CorelDraw. Flexo plate is a unique plugin that extends the possibilities of working in CorelDraw for printers using flexography.
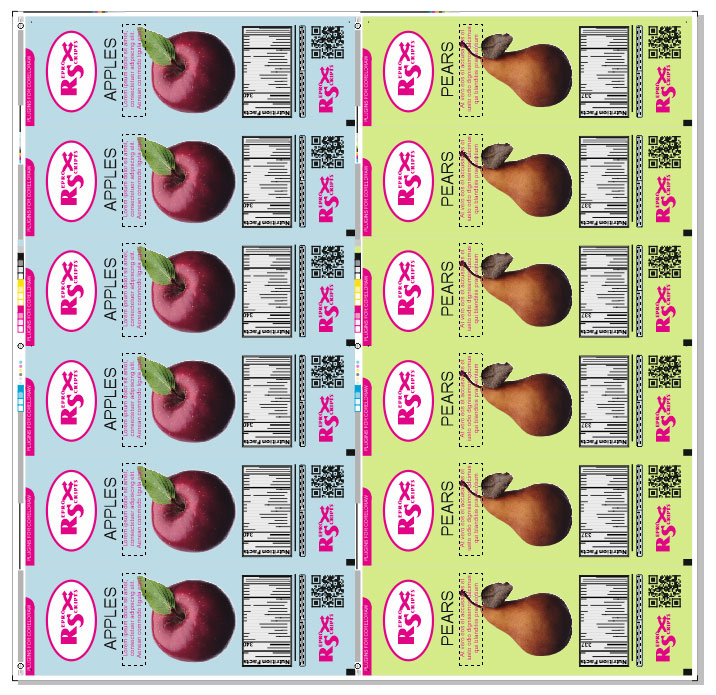
The main idea of the plugin is preparation of a file completly ready for making flexo plates on roles of different diameters from one or several source CDR files. At the moment, the resulting file is formed without compensating for the distortion, which is supposed to be taken care of in the RIP settings.
Projects management

Many of the ReproScripts plugins use projects to organize their work. Each project contains complete information for them to carry out the required task. Flexo plate keeps in projects the list of the source documents used for the flexo imposition, selected roll size, marks settings, etc.
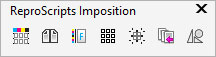
There is a project manager control at the top of the plugin's window. To create a new project, click the button and give it a name. As a name, we recommend using the job order number. This will allow you to easily navigate in the list. If you make any changes to the project, you must save it by clicking on the button with a floppy disk .
A detailed description of all the features of the project manager and its settings can be found on the Auto Impose plugin page.
List of jobs for the imposition
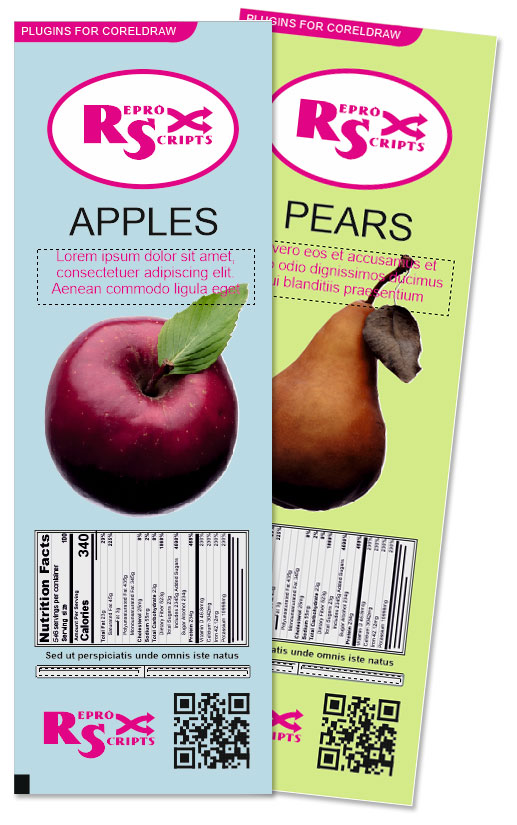

The plugin allows to perform layout of more than one job on the plate. All the jobs must first be added to the list of project source files. To add a new job open the required document in CorelDraw and click the button. One page of the document, which is active, will be added to the list. In this way, you can add other pages of this or other documents.
The list shows all jobs intended for flexo plate making. The page number and file name from which it is taken are listed as a link in the upper-left corner of the list row 1. Clicking on the link allows you to go to the correct page in the CorelDraw document. This is convenient, especially when working with old projects - no need to look for source files on the disk.
When you add a job to the list, the plugin automatically assigns it a name that matches the project name. You might want to change it especially if there are several jobs in the list. The job name is added into the plate layout for easy identification.
Also the plate will contain information from the field about the customer, if it is filled in. The third text field is intended for general comments on the job.
Inks (=separations)
When you put the job into the list, the plugin analyzes the colors present in the document and creates a color list 2. Each ink is represented by a button with a sample color, clicking on which you can change it:
- change the name of the ink, e.g. if it is too long
- indicate that the ink is the white underprint. If the job contains white ink, it is used by the plugin while forming the layout as the underprint for the scale. As well the colors bar and the dot gain stars does not include the white ink entry. Buttons with color samples that are marked as white 4 are indictaed with the letter W
- provide the information that the ink in the design is used only as a 100% solid color - no tints. The plugin is capable of finding this out by itself from the job's design, but the operator can always change the calculated value. Solid inks included as 100% patches in the scale color bars without any tint patches. Buttons with 100% solid inks, are marked in the list with the letter S
- inks can also be removed from the list
Two additional buttons in the list of colors allow to re-scan the colors in the job's design or simply add an ink manually .
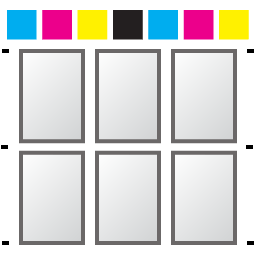
Columns and rotation
In addition to placing various jobs on one plate, the plugin also allows to create several columns from one job. By default, the layout is done in one column, but you can specify a different value for each job separately.
Also, if necessary, the prepress operator can set the rotation of the job 3 in the layout to 90, 180 or 270 degrees.
The roll size

The main parameter for the operation of the plugin is the size of the roll 1 used on the printing press. The list of available sizes can be set in the settings by clicking the button with the gear in the lower right corner of the window. You can specify any values in the currently used measurement units (mm or in), separated by a | sign 2.
The plugin will calculate the ability to perform the layout for the specified roll and for jobs in the project list. If an error occurs, it will be visible in the status bar.
Elements of a plate
On the Options tab of the project, you can specify the dimensions of the elements, indents and the need to place microdots.
Indents

On the edges of the plate the plugin adds corner elements, indicating the boundaries. The distance from the corner elements to the content of the printing plate can be adjusted. By default its value is set to 5 mm.
Another indent which can be changed is the distance from the printing scale to the border of the imposed job.
Printing scale
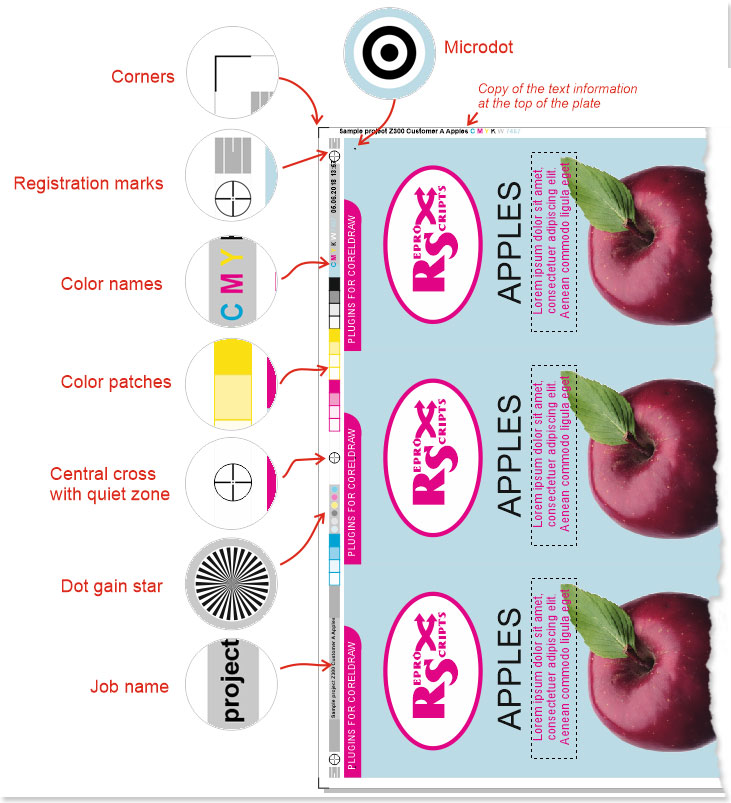
On the left hand side of the plate, a printing scale with technical marks is added. Its width is set to 5 mm by default (can be changed in the Options tab) and the height equals the size of the roll used. If the white ink is present in the design, a 100% white underprint is added under the entire area of the scale. Within the scale borders different elements are located - press registration marks, the dot gain stars, color patches and textual information. Depending on the height of the roll, the entire space of the printing scale is not occupied by useful information is covered with 30% Registration color.
Registration marks

To provide for the registration of plates with different separations on the press in the upper and lower part of the printing scale there are rectangles with a width of 5 mm (can be changed in the Options tab) filled with a 30% Registration color. These are three white lines of a thickness of 0.15 mm in white. The left and right ones have heights of 5 mm, the central one is 2 mm.
In the center of the scale a register cross is placed. For a distance of 10mm from it there is a quiet zone without any objects present. Similar crosses are placed at the distance of 1 mm from the top and bottom registration rectangles.
Dot gain stars

Stars intended for a dot gain control in the press are placed down from the central registration cross. The distance between individual stars is 0.75 mm. The stars are created by the plugin for all inks except the white one.
Color patches

For each ink in the job's design, a group of adjacent rectangles is created. The rectangles are filled (from top to bottom) with 100%, 50%, 10%, 2% tints of the ink. For the solid inks which have only 100% usage in the job the only one rectangle of 100% color is placed.
These color patches are located on the printing scale evenly: one part above the central registartion cross , the second part under the dot gain stars.
Text information

Text color is placed on the scale and duplicated at the top of the plate:
- order number in 100% Registration
- the roll size (the letter Z is added in front of the size value) in 100% Registration
- the customer name in 100% Registration
- a list of inks - each is colored only with its own color. For the white ink, a text description is not done.
- the date of the imposition
Microdots

If specified in the project options, the plugin places 6 micro-points, colored with 100% Registration.
Four micro-dots with a diameter of 0.4 mm are placed at a distance of 5 mm from the top and bottom edges of imposed jobs. The dimensions of the shifts can be changed in the plugin options. Two more microdots will be positioned in the middle between the top and bottom ones.
If there is a fotomark used in the job for the printing control purposes the microdots must be shifted to avoid overlap. The plugin can automatically check the design and located the fotomark by its name and shift the dots. To achieve that the fotomark shape in the document must be assigned the predefined name - FotoMark by default. The name can be changed in the plugin settings available by clicking on the gear button in the right lower corner of the form.
Microdots can be repositioned manually or turned off completely by the prepress operator in the project Options tab.
Imposing
To perform the imposition, click the button. It will be active if the plugin has enough information to start working. If there is a problem with the parameters of the project an error message will be displayed in the status line at the bottom of the form or in the list of stations.
The imposition process includes a lot of steps. If an error occurs on any of them, it will be added to the log. Having finished its work the plugin will report that there were problems. To view the log and find out what happened, click on the button with an exclamation mark in the status bar.
Saving files with the created imposition
In order for the plugin to automatically save the generated imposition files, it is necessary to activate the option save finished impositions to one folder in the settings and specify the folder into which the files will be placed.