
ReproScripts Security Guilloche rosette designer plugin for CorelDraw
- design complex rosettes in minutes
- move layers while maintaining the rosette structure
- diverse fill and blend curves in layers
- regions of curve density variation within the fill pattern
Guilloche rosettes are an attractive and memorable design element for certificates, tickets, and other products. However, creating such elements without specialized tools is very labor-intensive and often completely impossible. The Guilloche rosette designer plugin offers a unique opportunity to quickly and easily create a wide variety of rosettes to complement your designs. Thanks to its well-designed interface, even the most complex rosettes can be assembled in minutes and easily modified as needed. Working with the plugin requires no special mathematical knowledge and is designed for use by designers.
Plugin window interface
The main plugin window contains a list of presets, initially populated with several example rosettes 1. You can create your own rosettes and save them to this list for future use.

To change the design of a preset rosette, you can use the Edit/Duplicate commands from the menu to the right of the list 2. You can also immediately create a new rosette with basic parameters by clicking the button.
Editing a rosette
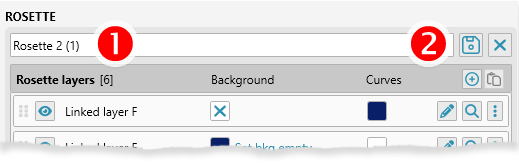
After opening a rosette for editing, you can see a list of the layers it consists of. A number of layer operations are available in this list.
You can specify a new preset name 1 and save your changes, or exit editing mode without saving your current changes 2.
Moving a layer
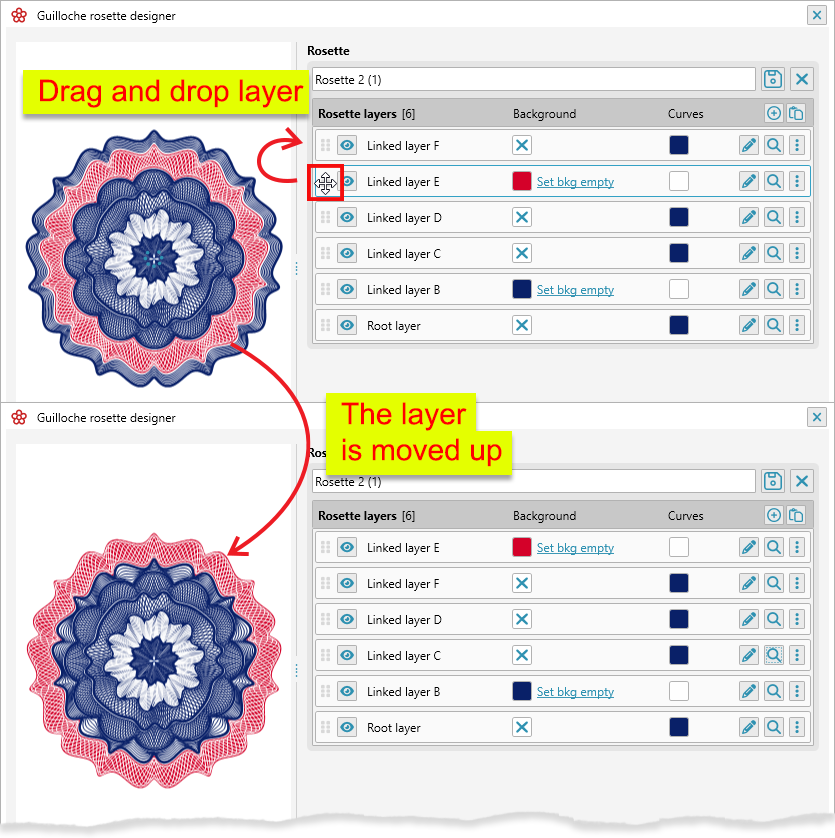
Layers in a rosette can be moved. To do this, left-click the button with the dots and drag the layer to the desired location. The structure of the entire rosette will change, and the layer boundaries will be adjusted (provided that the bottom boundary of the layer is snapped to the previous layer).
Copying and pasting layers
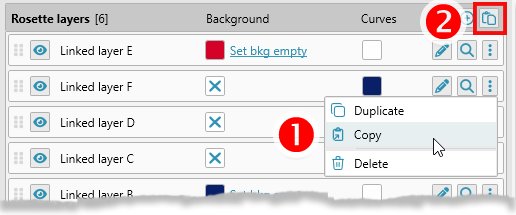
A menu with additional operations is available under the button with three dots for the layer. Specifically, you can copy a layer to memory 1. If a layer is in memory, the paste button 2 in the list header will be active. This way, you can move layers between different rosettes or simply duplicate layers.
Changing colors
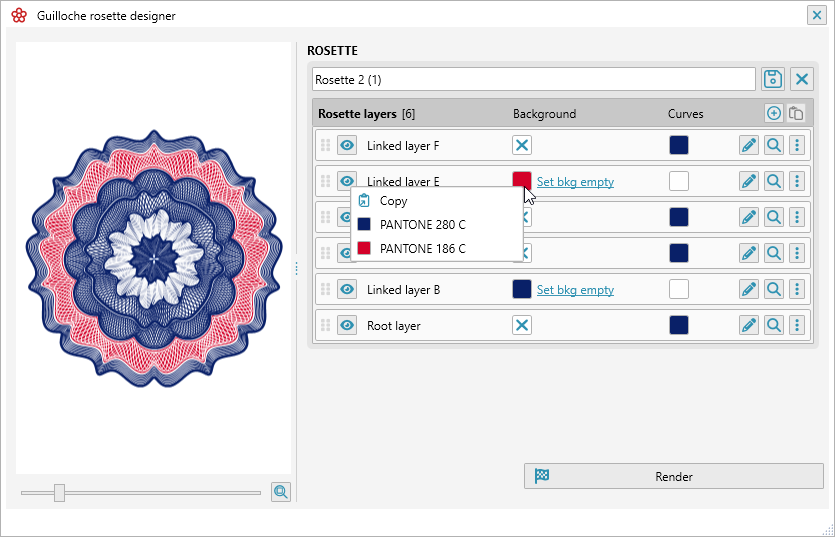
The list displays information about the background color and the color of the fill lines for each layer. You can change the color by clicking on the color square. Right-clicking on a color also opens a context menu from which you can copy the color to memory and paste it elsewhere. You can copy up to five colors to the context menu.
Highlighting a layer
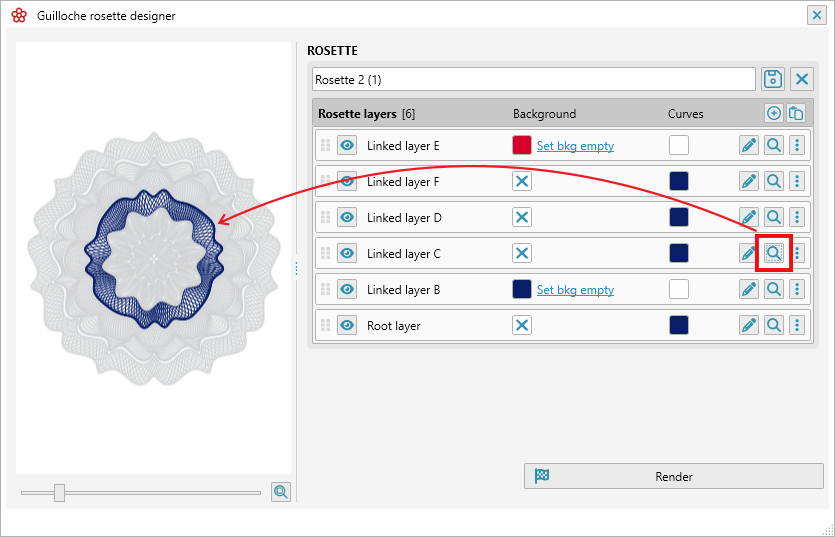
When a rosette has many layers, it's easy to get lost. To make layer navigation easier, you can use the button. By clicking the button, you can make only one layer active, muting the colors of the others. This will help you understand the position of the selected layer in the rosette.
Hiding a layer
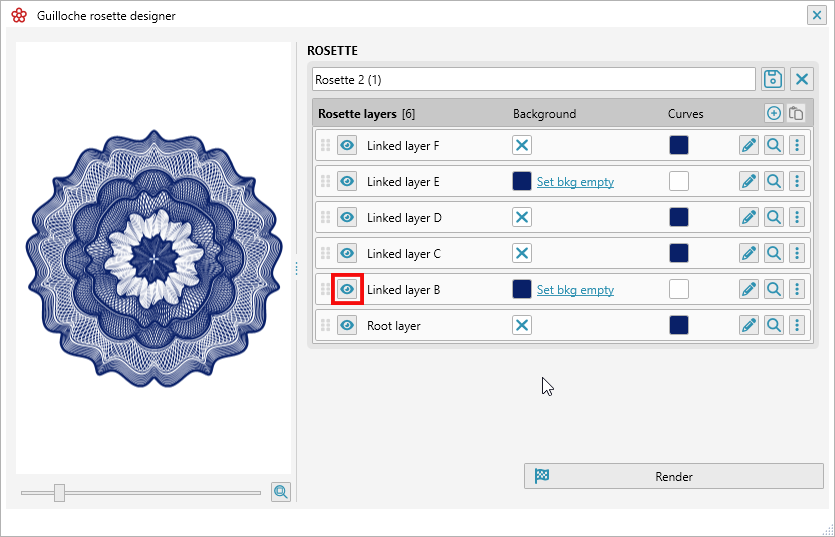
The button with the eye icon controls the layer's visibility. It always participates in the rosette structure, but if necessary, it can be hidden, leaving only empty space within the rosette with the boundaries corresponding to that layer.
Other layer operations
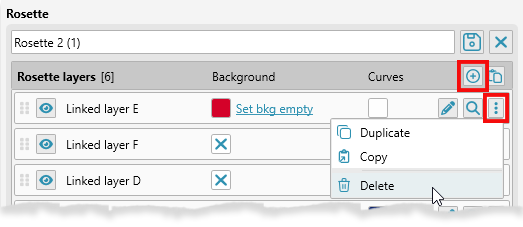
You can add a new layer by clicking the button in the list header. The layer menu also contains duplicate and delete operations.
Editing a layer
In addition to a number of operations available in the list, you can open an editor for each layer, where you can set the parameters of the upper and lower baselines and adjust the fill curves for the layer.

The layer editor contains three tabs, each of which allows you to configure the inner and outer baselines, as well as fill curves. Baselines for each layer can be enabled or hidden in the design; their thickness and color can be set.
Inner Baseline
The inner baseline can be linked to the previous layer or have completely independent, fixed parameters.
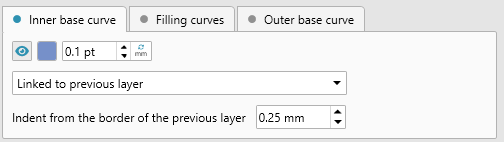
A linked inner baseline will follow the shape of the outer baseline of the previous layer, with the specified offset. This mode is set by default for all new layers and allows you to easily construct rosettes from consistent, closely spaced layers, as well as move layers within the list while maintaining the integrity of the rosette structure.

However, you can also set completely independent parameters for the inner baseline, including base dimensions and an additional shape line. The logic and parameters for setting up the internal base in this mode are similar to those of the Math Curve Maker plugin and are described in detail.
The very first layer of a rosette is the root, and its internal base must always be defined using fixed parameters, as there is no previous layer from which to copy parameters.
Fixed parameters can also be added as a design decision, for example, by placing one layer on top of an existing one.
Outer Baseline
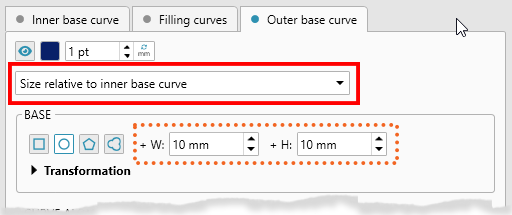
An important parameter for the outer baseline is the mode in which its size is determined. By default, the size of all layers is set as an offset from the inner baseline. This allows you to easily resize layers and move them within the rosette without having to calculate precise values.
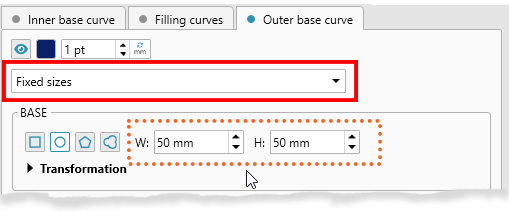
You can also set fixed dimensions for the outer baseline. However, in this mode, the size will not adjust automatically, which can lead to unexpected results when changing it in other layers. However, this mode can also be used to implement specific design decisions.
Other outer baseline parameters are similar to those in the Math Curve Maker plugin.
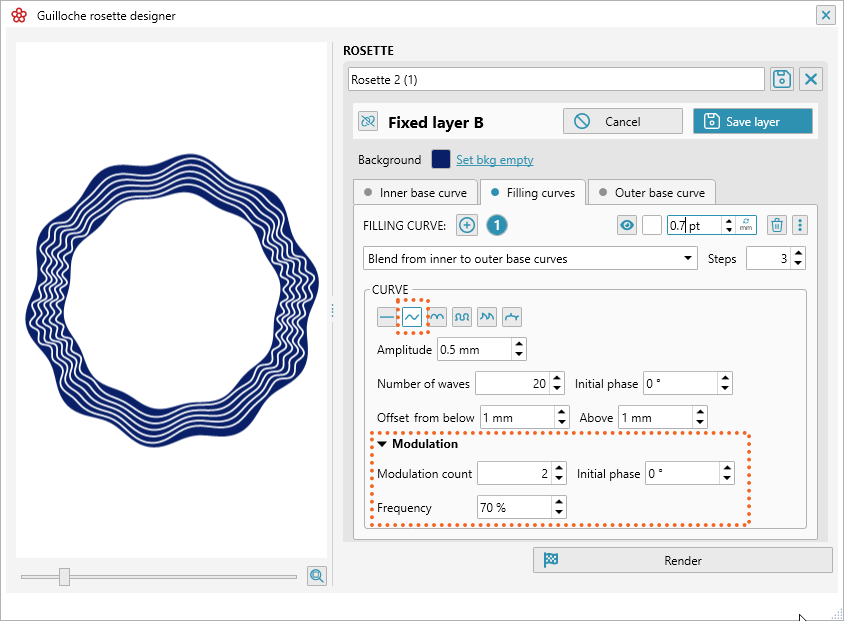
Inner fill curves
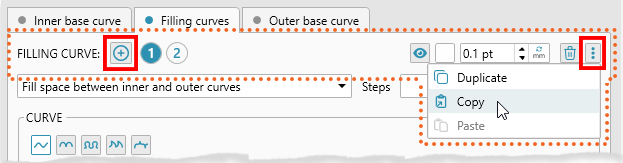
The space between the inner and outer baselines is filled with curves.
You can specify multiple curves with different parameters (including color and thickness) by clicking the button in the curve selector. You can navigate through the curves by clicking the indexes. Curves can be duplicated, copied to and pasted from memory using the curve menu.
The plugin supports two curve modes: fill and blend.
Fill Mode
In this mode, the waves of curves will touch the outer and inner baselines, forming a closed curve. The number of steps determines how many curve duplicates will be placed. You can also specify an offset in degrees for each curve. With the automatic value, the offset will be calculated so that all curves evenly fill the entire space. Manual offset values allow you to achieve various visual effects.

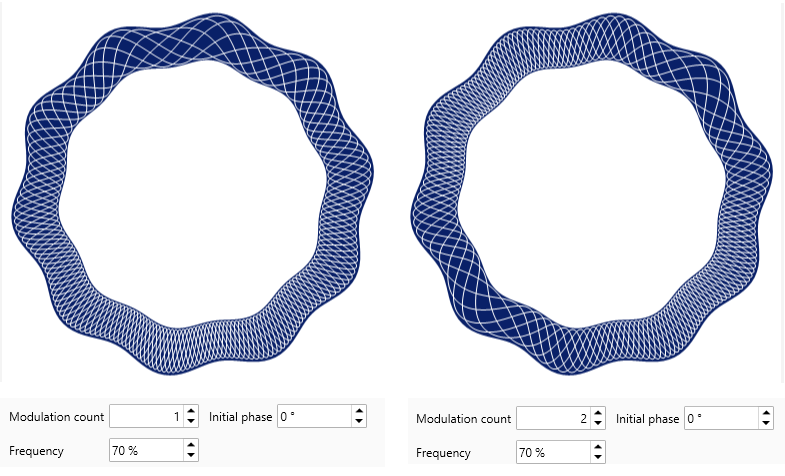
To create zones of higher or lower density, you can use the modulation parameters. Specify how many zones you want to see and set the maximum percentage deviation in wave frequency.
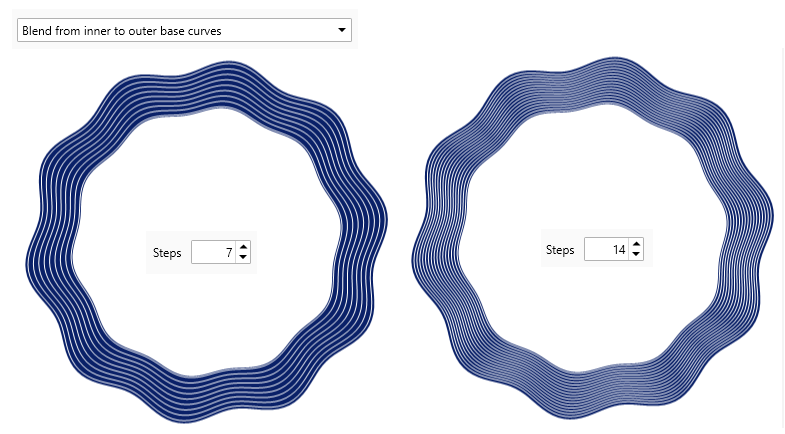
Blend Mode
In this mode, the shape of the fill curve will smoothly change from the inner to the outer base. The number of steps affects the distance between lines. The shape of the fill curve can be further adjusted using parameters. If a line is selected, you will get a uniform morphing of the shape from the lower to the upper base.
For other curve types, you can specify the parameters described in more detail for the Math Curve Maker plugin, including frequency modulation.
Rendering a rosette in CorelDraw
To generate a rosette in CorelDraw with the parameters you've configured, click the button at the bottom of the plug-in window. The plug-in will create a new document and draw the rosette in it.
Rendering is available both in preset mode and with the editors for the entire rosette or a specific layer open. This allows you to interactively change the rosette's parameters and immediately get the final result in CorelDraw, or even render a specific layer (which is open in the editor).