ReproScripts Imposition Nesting plugin for CorelDraw
- automatic nesting of irregular shapes
- adding cutting lines along the contour of the image drawing
- nesting until the sheet is filled
- generation of CDR, PDF, DXF files with cutting lines
- optional placement of graphics in the nesting with added bleed
For large-format printing and plotter cutting, it is important to lay out many objects of various shapes on one sheet. The nesting plugin for CorelDraw allows you to automate this operation and generate a CDR file that contains not only cut lines that can be sent to the cutting plotter, but also graphics, taking into account the specified bleed. This allows you to print wide format first and then cut using the same work file. Additional options such as automatic addition of a cutting line for images along the outline of a drawing or nesting until the sheet is completely filled significantly optimize work processes.
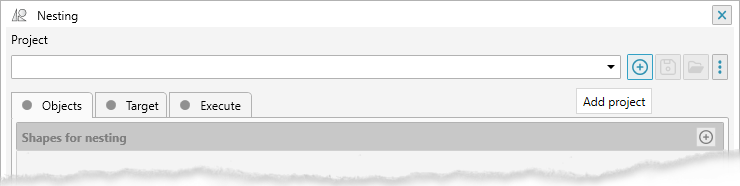
Projects
The work of the plug-in is organized in the form of projects. Each project contains detailed information about all nesting parameters, including source files, calculation parameters, etc. To create a new project, click the plus button in the project manager and give it a name.
The principle of working with projects is the same as in other plugins of the library. A detailed description of all the features of the project manager and its settings can be found on the auto imposition plugin page.
List of jobs for nesting
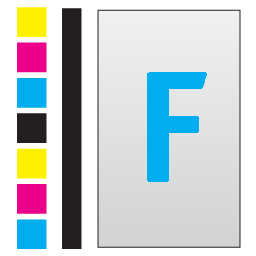
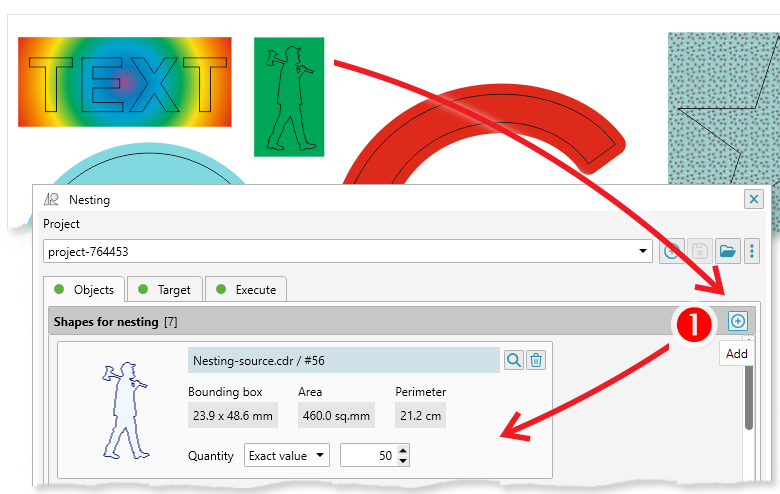
To perform nesting, you must first make a list of objects that will be used in the work. To do this, select the desired shape in the document and click 1 the plus button. If the object is suitable for nesting, then it will be included in the list and an icon will be generated for it for easy navigation. By clicking on the icon, you can find this object in the source CDR file. Objects for nesting can be added from various documents.
It is important to understand that it is necessary to add objects to the list whose borders will serve as cutting lines. The graphics must be located under this line. When forming a CDR file for placing graphics, all objects under the cutting line will be selected, placed in a clip with the required allowance and placed in the finished CDR file.
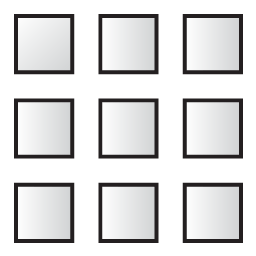
Adding multiple objects
The plugin allows you to simultaneously add multiple selected objects from one document. Each of them will be processed and added to the list separately. You can add simple vector objects to the nesting list, which will serve as a cutting line, as well as images, the cutting line for which will be built automatically.
Adding images with auto tracing
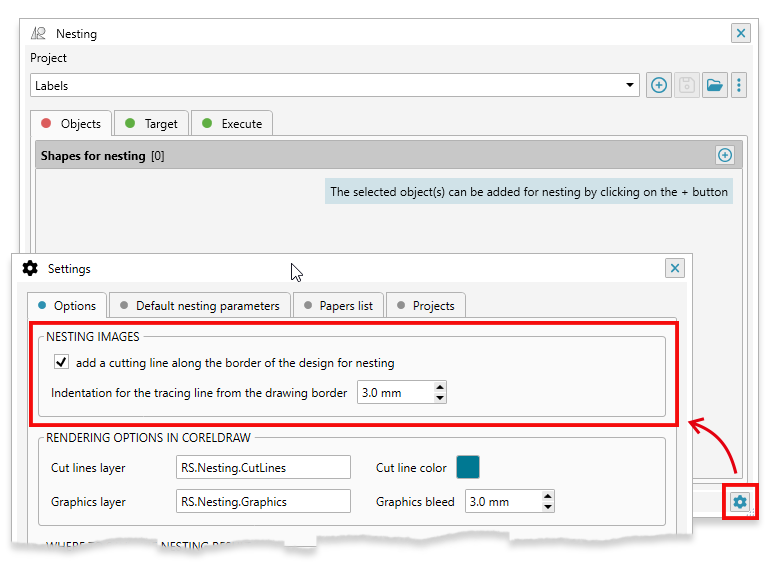
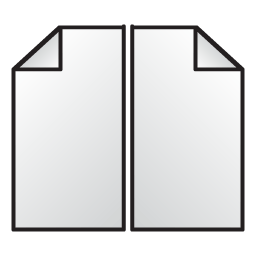
You can also add images to the nesting list, they will be traced to find the outer cutting boundary. You can enable this option and set the indent inside the image as a bleed in the plugin settings.
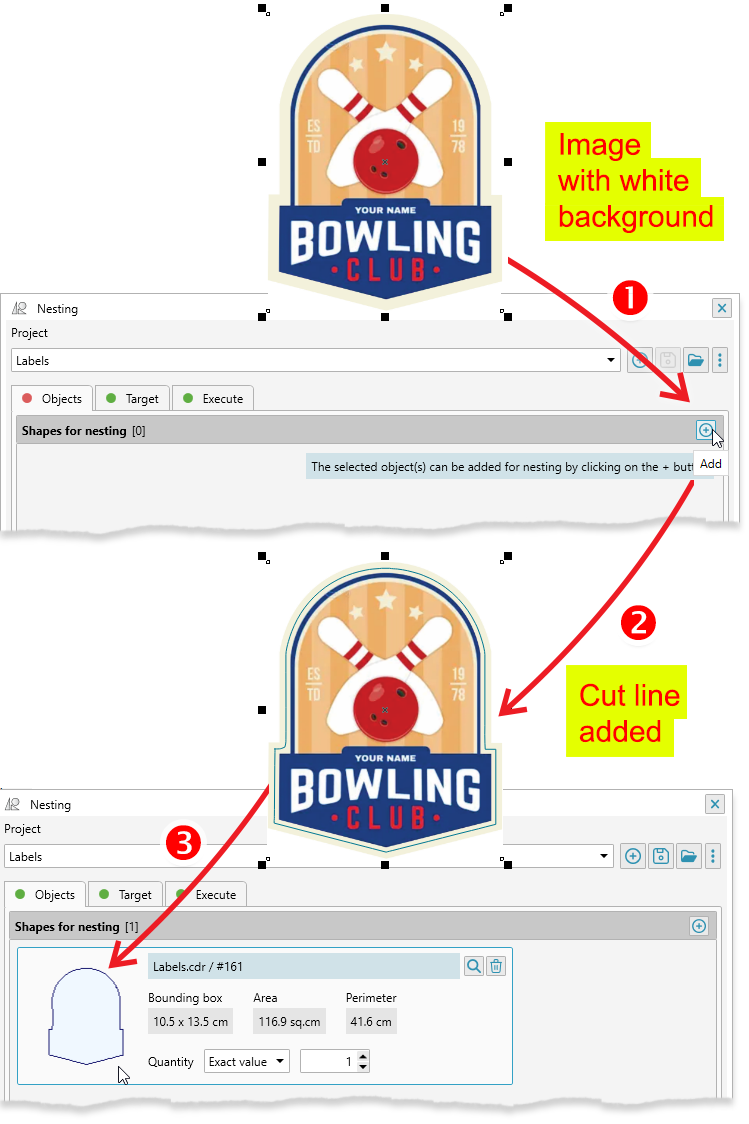
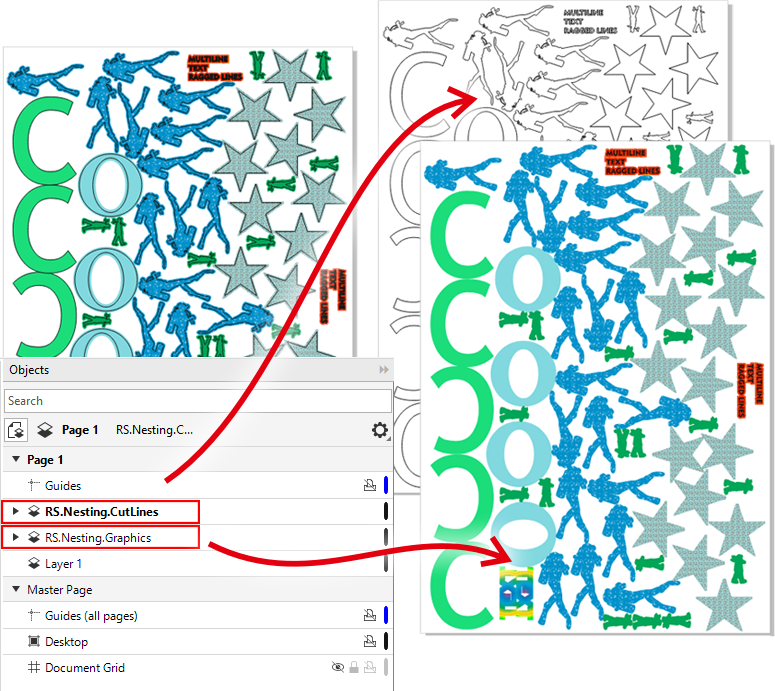
When the tracing option is enabled, the plugin will process the image and build a cutting line with a specified indent inside the image. The cutting line is saved in the file where the image is located, since it will be needed when rendering the finished nesting files.
Select an image 1 in the CorelDraw document and click the Add button in the nesting project. The plug-in will generate a cutting line along the border of the image in the selected image object 2 and add it to the nesting list 3. The indentation of the cutting line from the edge of the drawing is set in the plugin settings. If necessary, you can make edits to the automatically generated cutting line and then replace it in the project list with the modified version.
If the tracing function is disabled, then the selected images cannot be added to the nesting list — they will be skipped.
Nesting until the sheet is filled
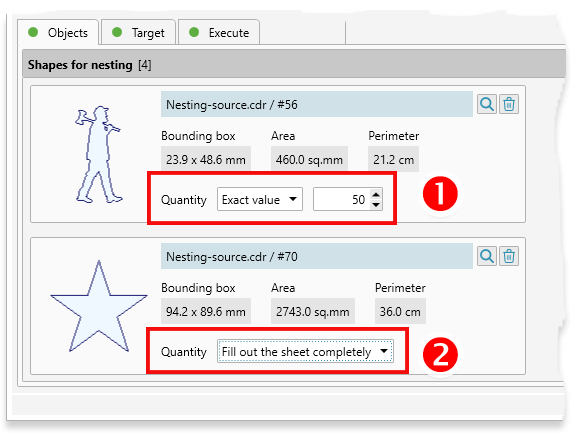
For each added object, you can specify the exact quantity of copies 1 that will be placed in the nesting. When performing the calculation, the plugin will place this object the specified number of times.
Alternatively, you can specify the number until the sheet is completely filled with this object. 2 In this case, for each such object, the plugin will allocate an entire sheet and try to fit the maximum possible number of objects on it.
Target sheet
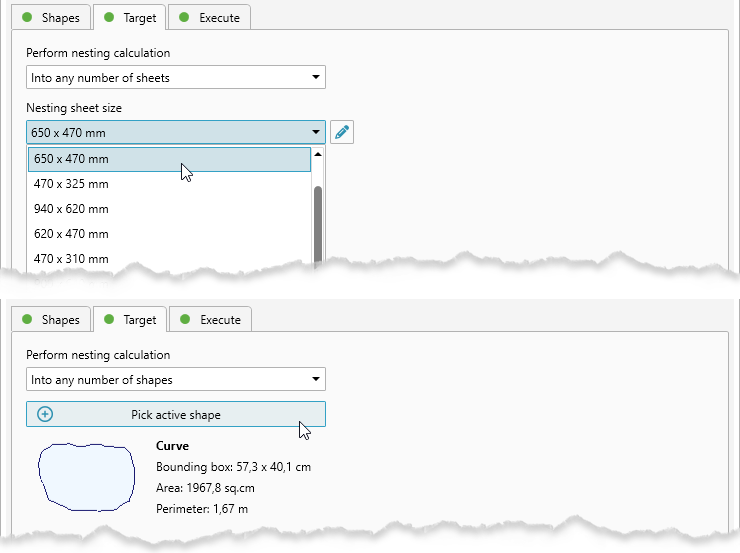
The second important nesting parameter is the sheet on which the layout will be performed. You can set either a rectangular sheet with an exact size or select a CorelDraw object that will be used for nesting. The last option in the list allows you to set the exact number of rectangular or irregular sheets to be used.
To place a nesting inside an irregularly shaped object, first select or draw an object of the desired size and shape in CorelDraw. The add button will become active as soon as you select it in the document.
Please bear in mind that the plugin will try to place the maximum number of source objects on the target sheet. If this is not possible, a part of the object will not end up on the finished sheet with nesting. The same situation can happen if the size of the source object, taking into account the bleed, exceeds the size of the target sheet.
Nesting calculation
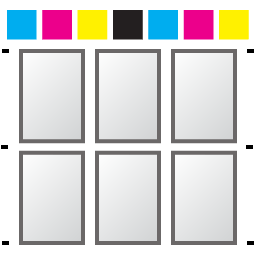
To perform nesting calculation, go to the last tab and start the process by clicking the Start nesting button. 1 The plugin will perform the calculation and present the first suitable nesting variant.
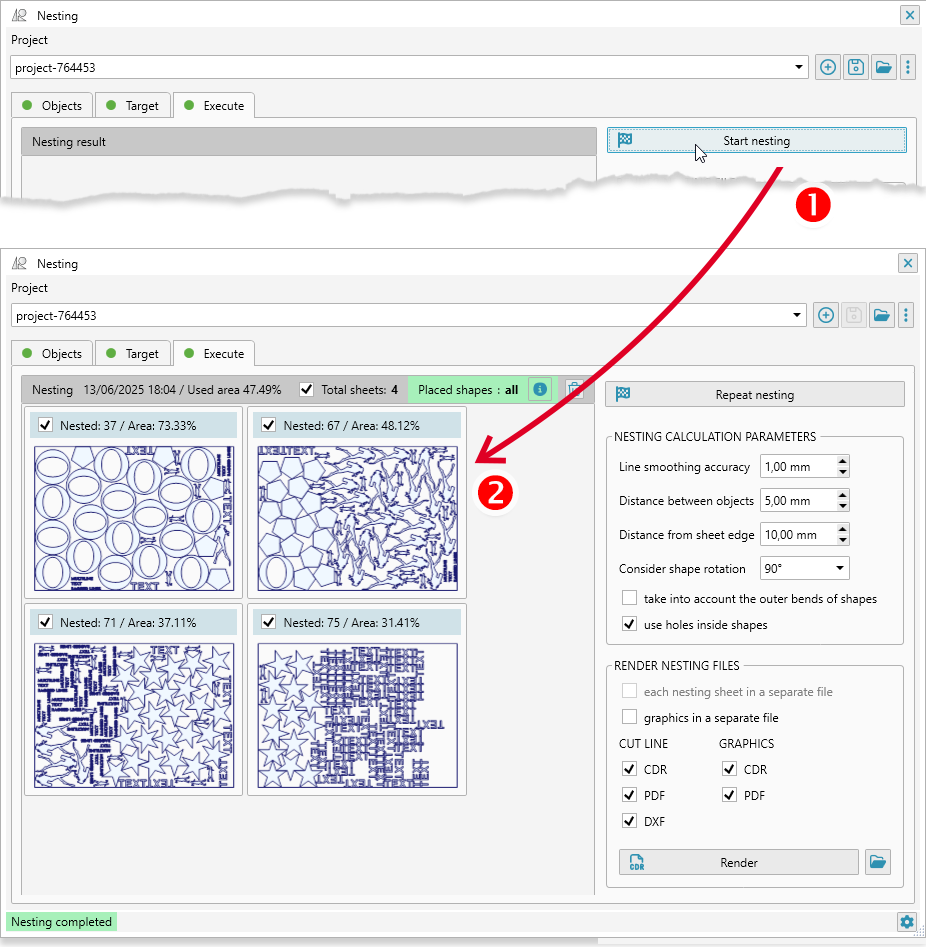
In the nesting result list, 2 you can see detailed information about each sheet, indicating the object placed on it and the area occupied. The list header contains general information on the nesting area, as well as data on whether it was possible to place all or only part of the original objects.
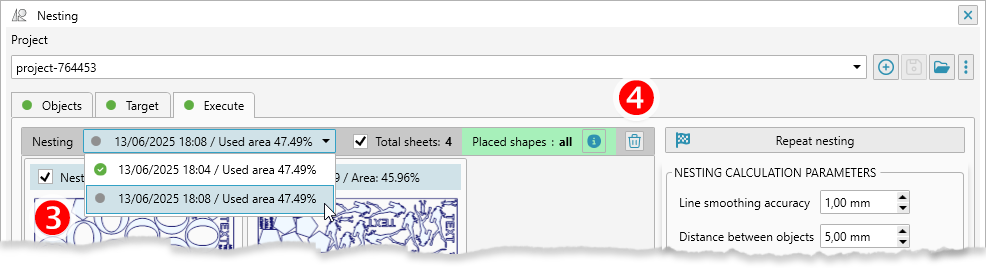
The nesting calculation can be repeated by clicking the Repeat nesting button — a new placement search will be performed, which in some cases can lead to more optimal results. If there are several variant, a list 3 for selecting one of them will appear in the list header. If the nesting option is not needed, it can be deleted by clicking the button with the trash. 4
Nesting calculation parameters
Below the Start nesting button there is a group of options using which you can set a number of important parameters that will have a significant impact on the speed of work and the quality of the final result.
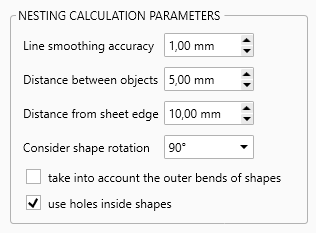
Line smoothing accuracy
To increase the nesting search speed, the plugin performs some simplification of the shape of objects. A higher value of this parameter will increase the speed of work, but may reduce the exact calculation. This setting can have a significant impact on nesting speed, especially for non-rectangular target sheets.
The recommended value is 1 mm or more.
Distance between objects
The distance between objects must be set no less than the maximum graphics bleed that will be placed in the finished file. If only cut lines are needed, then this parameter can be left at 0.
The specified value also affects the indent from the edge of the sheet to the object's border.
If rendering with graphics is used, this parameter must be no less than the size of the graphics allowance.
Distance from sheet edge
Indent on all sides of the sheet inward to the border of the placed shapes. This parameter is applied both to rectangular and shaped sheets.
Consider shape rotation
When performing the nesting calculation, the plugin can take into account the possibility of rotating objects at different angles. This option may increase the calculation time. For most applications, it is sufficient to set the rotation to 90 degrees.
Take into account the outer bends of shapes
The plugin will try to more accurately take into account the external shape of the object for nesting, not limited to rectangular borders.
Use holes inside shapes
If there are objects with holes inside, the plugin will try to place objects in them. This will allow the most optimal use of the material when cutting and printing.
Rendering the final file in CorelDraw
For the found variants, you can optionally generate CorelDraw file with nesting and/or PDF files that contain cutting lines and/or graphics and a DXF file with a cutting line.
You can manage rendering options using a number of settings. 1 In them, you can specify the required output file format, as well as whether to split sheets and graphics into separate files or combine everything into one.
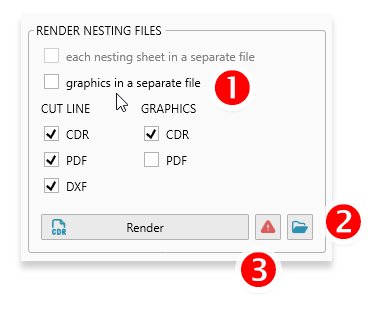
To open the folder in which the finished files are saved, you can click the button 2. If errors occur during the rendering process, a warning button will be visible, by clicking on which you can find out more about the problem. 3 The rendering of finished nesting files is performed only for the marked sheets. By default, all sheets are initially selected.
The plugin settings
In the first tab, 1 you can specify whether to perform tracing of the added images and set the size of the indent inside the drawing as an allowance.
You can also specify the color of the cutting lines and the name of the layers for graphics and lines for the finished CDR file. This parameter will allow you to synchronize the work of the plug-in with the subsequent workflow for printing and cutting on the plotter. 2 Here, you can also set the allowance for placing graphics when rendering the finished file.
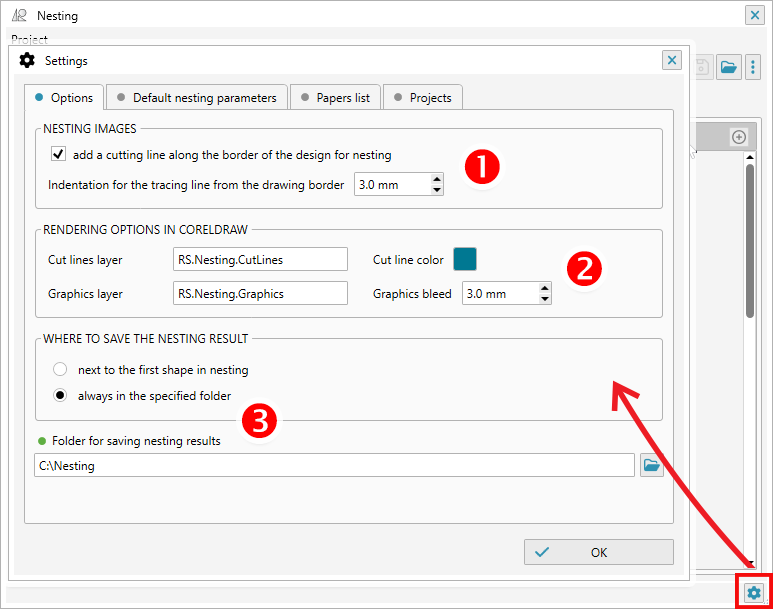
The finished CDR, PDF or DXF files can be saved either in one specified folder or in a folder next to the first figure added for nesting. 3 A separate folder with finished files will be created for each project.
In the second tab, you can set the parameters for calculating the nesting, which will be copied to all new projects, this will speed up and simplify the creation of projects for running nesting.
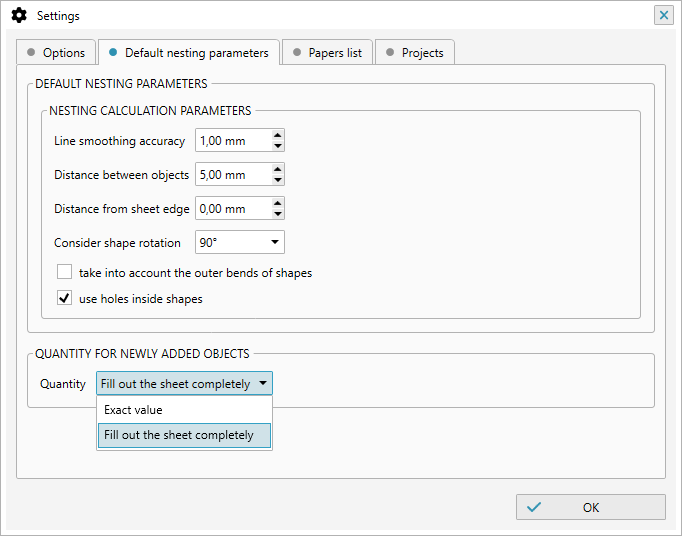
In addition to the parameters used when calculating nesting, you can also set the default quantity for newly added objects. You can set up the most convenient mode and quantity to reduce manual routine edits.
Project settings management is performed similarly to other plugins and is described in detail here.